Niresh Mac OSX Yosemite 10.10.1 DVD ISO Free Download
Here are the requirements:
- An existing Windows computer/Mac/Hackintosh: This is the computer where you will download and set up Yosemite Zone. The computer can run either Windows or Mac OS X; both operating systems will work.
A Hackintosh-compatible computer with an empty hard drive: This is the computer where you will install OS X Yosemite. It can be the same computer as the one mentioned in the previous point. If your computer already has Mac OS X installed, Yosemite Zone will just update OS X normally, without deleting any of your apps or files.
However, not every computer will work with Mac OS X. Be sure to read the Hackintosh compatibility guide very carefully, to check whether or not your computer qualifies. Also, Mac OS X needs its own hard drive partition-- a minimum of 10 GB of space is required, but at least 50 GB of space is recommended. It's preferred that you use a completely empty hard drive for this, but if your computer already has Windows installed on your hard drive, be sure to create an appropriate hard disk partition for OS X Yosemite beforehand (by following Step 1 of our guide to MBR partitions).
- Yosemite Zone 10.10.1 (Free): Yosemite Zone is a distro of OS X Yosemite that has been modified to work with PCs. You will need to use a bittorrent client to download the disk image file containing Yosemite Zone, which is a little less than 6 GB in size. You must register on the Hackintosh Zone website to be able to download anything.
- An empty USB drive (6 GB or larger): In this guide, you will write Yosemite Zone onto a USB drive, and boot your computer from that drive to install OS X Yosemite. The USB drive must be at least 6 GB in size. Since you will need to erase all of the files on the USB drive, make sure to back up its contents first. You can reuse this USB drive for normal stuff after you finish installing Yosemite.
- TransMac: ($48, 15-day free trial): If you're using a Windows computer to set up Yosemite Zone, you need to use TransMac to write the disk image file onto your USB drive. You can just download the free trial.
- Restore Yosemite.pkg: (Free): If you're using a Mac to set up Yosemite Zone, you need to Hackintosh Zone's special "Restore Yosemite" app to write the disk image file onto your USB drive. Again, you must register on the Hackintosh Zone website to be able to download anything.
- Multibeast (Free): Multibeast is a collection of kext files that your Hackintosh will need to run properly, after the initial installation. Be sure to download the newest version 7 of Multibeast, not the older versions 3, 4, 5, or 6 (which are for Snow Leopard, Lion, Mountain Lion, and Mavericks respectively).
1a. Create your Yosemite Zone USB drive (Mac)
Follow this step if you're setting up Niresh on a Mac or existing Hackintosh. Plug your USB drive into Mac OS X, and open Disk Utility (located in Applications->Utilities in your main hard drive). Select your USB drive in the sidebar of Disk Utility and erase the drive, with the "Format" set to "MS-DOS (FAT)". You can rename the drive any way you want.
Next, make sure that your Yosemite Zone disk image file is in the same folder as "Restore Yosemite.pkg". If "Restore Yosemite.pkg" is still in a ZIP file, double-click that file to unzip it.
Double click on "Restore Yosemite.pkg" to start the app. By default, the app will be aimed at your computer's main hard drive (mine is named "Super Panda" in the screenshot below). You do not want this-- instead, click through the installer until you reach the page with the "Change Install Location" button.
From here, change the install location of the app to your USB drive (mine is named "Macaroni" in the screenshot below).
Press the enter/return key. The app will ask for your system password. After you enter your password, it will begin writing the Yosemite Zone disk image onto the USB drive. This will probably take 20-40 minutes, though it may take longer, depending on the speed of your USB drive. Once it finishes, your USB drive will contain a fully bootable version of the OS X Yosemite installer.
NOTE: "Restore Yosemite.pkg" is very glitchy. If you can't find the "Change Install Location" button on the first time that you run the app, restart your computer and re-run the app.
1b. Create your Yosemite Zone USB drive (Windows)
Follow this step if you're setting up Yosemite Zone on Windows. Plug your USB drive into your computer, and open TransMac. Find your USB drive on the left-hand column of the TransMac window. Right-click on the USB drive, and click "Format Disk for Mac". This will delete all of the files on your drive and prepare it for Mac OS X.
Once your USB drive is done formatting, right-click it again and click "Restore with Disk Image". A file selection window will pop up; choose your Yosemite Zone disk image file (it will probably be called "Yosemite-Zone.dmg"), and proceed. Now, TransMac will write Yosemite Zone onto your USB drive.
This will probably take 20-40 minutes, though it may take longer, depending on the speed of your USB drive. Once TransMac finishes, your USB drive will contain a fully bootable version of the OS X Yosemite installer.
2. Set up the parts of your PC
I covered these steps in my Snow Leopard guide, but they're worth mentioning again:
- Unplug all USB-connected devices from your computer before you begin the setup (except your keyboard and mouse). A faulty external USB hard drive can cause your Hackintosh bootloader to give you EBIOS errors on startup.
- Open up your computer and unplug any extra internal hard drives that your computer has, besides the hard drive that you're installing OS X on. (Just unplug the hard drive SATA cables from your motherboard.)
- If possible, connect your monitor to the DVI port of your computer's graphics. The Mac OS X installer sometimes has problems with HDMI and VGA.
NOTE: If you're installing Mac OS X on a computer that already has Windows installed, you may have to enable AHCI for Windows beforehand. Otherwise, Windows won't boot afterwards. Also, after installing Mac OS X, you should also sync your clock on Windows with Mac OS X.
3. Set up your motherboard's BIOS
Essentially, the BIOS (or UEFI) is the settings page for your computer's motherboard. From here, you can fiddle with how your computer hardware works-- it's often necessary to change a few basic settings in the BIOS or UEFI to get Mac OS X up and running. The BIOS standard is generally used by motherboards from before 2012, while the UEFI standard is used by motherboards made after that.
Not sure whether your computer's motherboard uses BIOS or UEFI? Here's a quick guide to differentiating between the two: the interface of BIOS is usually monochrome and entirely text-based. Meanwhile, the interface of UEFI usually has pictures, and allows you to use your mouse pointer.
Depending on the brand and standard used by your computer's motherboard, adjust your settings accordingly:
- If you own a Gigabyte motherboard with BIOS: Guide
- If you own a Gigabyte motherboard with UEFI: Guide
- If you own a non-Gigabyte motherboard with UEFI (from tonymacx86):
- To access BIOS/UEFI Setup, press and hold Delete on a USB Keyboard while the system is booting up.
- Load Optimized Defaults.
- Set USB drive to the highest boot priority.
- If your CPU supports VT-d, disable it.
- If your system has CFG-Lock, disable it.
- If your system has Secure Boot Mode, disable it.
- If your system has OS Type, set it to Other OS.
- Save and exit.
Once that's done, plug in your Unibeast USB drive in your computer, and then restart your computer.
4. Boot into Yosemite Zone
Restart your Hackintosh, and plug in your Yosemite Zone USB drive. If things go well, your computer will boot from the USB drive instead of booting from your normal hard disk. You will then be able to view the Yosemite Zone menu.
If you do not manage to reach the Yosemite Zone menu, check your motherboard's BIOS settings to make sure that the changes you made in Step 3 were properly applied. If they were, but you still cannot boot from the Yosemite Zone USB drive, unplug your USB drive, and go back to Step 1. Reformat your USB drive with Disk Utility and try again. If all else fails, try using a different USB drive for Yosemite Zone.
At the Yosemite Zone menu, press the enter key (or return key) to start the OS X Yosemite installer. The installer screen will take several minutes to load. If you are trying to install OS X Yosemite on a computer using an AMD processor, you'll have to type the boot flag "/amd", "/amd32", "/amd64", or "/amdfx (without quotation marks)-- which flag you need depends on your specific processor, so test one flag a time.
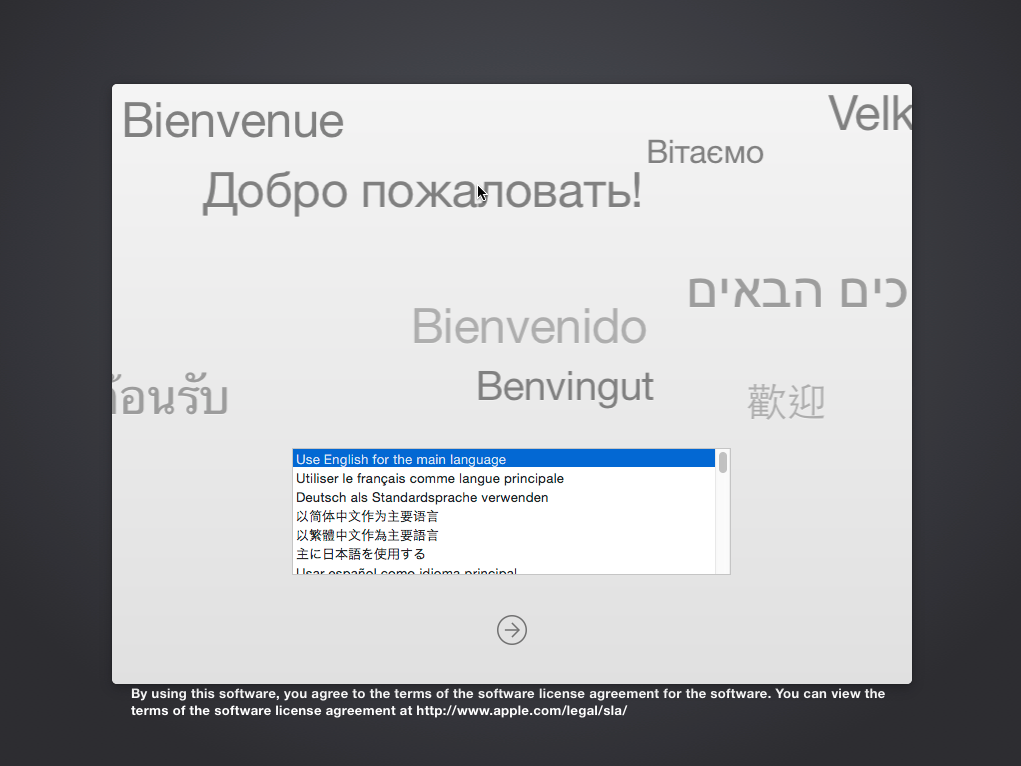
In the worst case scenarios, instead of loading the Mac OS X installer, you may end up at a dark gray screen that tells you to restart your computer (a kernel panic), or you may end up with a small crossed-out sign (a loading error). If you get a kernel panic/loading error (or if the Mac OS X installer simply won't start within 10 minutes), you'll need to enter some boot flags. To enter boot flags, manually restart your computer by pressing your computer's power button. Then, once you've booted back into the Yosemite Zone menu, try typing any necessary boot flags before pressing the enter/return key. Check out our list of common boot flags and our guide to fixing boot problems with verbose mode for reference.
5. Install Yosemite
Once you've entered the OS X Yosemite installer, you will come up to a hard disk selection page. This is where you choose where you want to install Yosemite.
If you're installing Yosemite on a computer that has never been turned into a Hackintosh before (i.e. doesn't already have Snow Leopard, Lion, Mountain Lion, or Mavericks installed), there won't be any hard disk options to select. We'll have to fix that. To do this, start up Disk Utility, which is located under the Utilities menu in the top bar.
You need to use Disk Utility to erase a hard drive partition so that OS X Yosemite can install itself on it. In the sidebar of Disk Utility, choose the hard drive partition where you want Yosemite installed, and erase it by using the "Erase" tab. You can also just erase the entire hard drive (this is the preferred solution if you don't plan to dual-boot Windows and Mac OS X from the same hard drive). In the screenshot below, my two hard drive partitions are called "Cool Stuff" and "Not Cool Stuff", while my entire hard drive is called "21.47 GB VBOX HARDDRIVE".
When erasing, the format should be set to "Mac OS Extended (Journaled)". You can also partition the hard disk by using Disk Utility's Partition tab.
NOTE: Mac OS X cannot boot from a partition that's larger than 1 TB in size, so if you have a 2 TB hard drive, you will have to partition it.
On the installation page for Mac OSX, the hard disk/disk partition should now be showing up. Select it, and then click the "Customize" button on the bottom left. This is where using a distro becomes really useful: Yosemite Zone allows you to install extra Hackintosh drivers and kexts, straight from the OS X Yosemite installer. The "Customize" page essentially does the same thing as Multibeast, though the layout (and most of the names of the options) are different.
However, choosing the right options from this page can be really tricky, so unless you're absolutely certain about which drivers and kexts you need to install for your computer, I don't recommend installing too much stuff from here. The default selection will enable Mac OS X to boot from the hard drive without any assistance, and automatically enable audio and ethernet. For most computers, that will be enough.
If you wish to install more, refer to our guide to Multibeast. Otherwise, you can figure out the rest in Step 7, where you'll actually set up your Hackintosh with Multibeast.
If your computer already has Mac OS X installed and you are simply updating it to Yosemite, you can just uncheck all of these options. Mac OS X treats Yosemite as just another update-- there's no need to reinstall all of your kexts and drivers.
Once you're done with the "Customize" page, install Yosemite. This will take at least 30 minutes.
6. Boot into Mac OS X
Once the installation finishes, remove your Yosemite Zone USB drive, and restart your computer. At the boot screen, you'll see an Apple icon for the hard drive where you installed Yosemite. Select it (use the arrow keys on your computer) and press "Enter".
Yosemite will boot. Mission accomplished! Once again, if you get a kernel panic/loading error when you try to boot your new Yosemite installation (or if the installation simply won't start within 10 minutes), you'll need to enter some boot flags. To enter boot flags, manually restart your computer by pressing your computer's power button. Then, once you've booted back into the Yosemite Zone menu, try type any necessary boot flags before pressing the enter/return key. Check out our list of common boot flags and our guide to fixing boot problems with verbose mode for reference.
Once Yosemite has booted successfully, click through through the Mac OS X setup screens until you reach the desktop. From here, Yosemite Zone will work its magic, and automatically install the rest of the Hackintosh-specific kexts and drivers from Step 5.
Wait several minutes, while this process works in the background. Once you receive a notification saying that the installation has been completed, restart your computer.
7. Multibeast
Multibeast is a collection of kext files that you'll need to install for your Hackintoshes to have sound, internet, a high resolution screen, and more. Different Hackintosh builds require different Multibeast setups, though most setups are very similar. Find out what options you need to install by checking our Multibeast guide to OS X Yosemite.
Whether you're installing OS X on your computer for the first time, or just updating your computer from an older version of OS X, you'll probably have to run Multibeast after the initial installation of Yosemite.
To run Multibeast in OS X Yosemite, you may have to go the "Security" section of System Preferences in Mac OS X, go to the "General" section, and check "Anywhere" in the "Allow applications" section. After running Multibeast, you'll also probably want to change your BIOS settings back to normal (from Step 4).
Once that's done with, you should be running a fully functional copy of OS X Yosemite on your PC
Congratulations!
link :


